TL;DR
Acoustic dampening isn’t just about foam — placement matters most. Moving your rig to a different room or closet with proper ventilation can drastically cut noise and improve recordings. Proper panel placement and sealing gaps help tame reflections and leaks, making even small closets workable for vocals or quiet workspaces.
Ever tried recording vocals or working on sensitive audio in a tiny closet? It’s like singing inside a cardboard box — harsh, echoey, and overly loud. But the truth is, a closet can become a surprisingly effective space for sound, if you know the tricks. The real game-changer isn’t filling every wall with foam; it’s about where you place your treatment and how you manage noise at its source.
This guide will walk you through practical steps to dampen sound, position panels like a pro, and even turn a closet into a low-cost vocal booth or quiet workspace. Whether you’re a hobbyist or a pro, mastering these techniques can make your space sound better — and keep noise where it belongs: inside the room, not in your ear.
Acoustic dampening
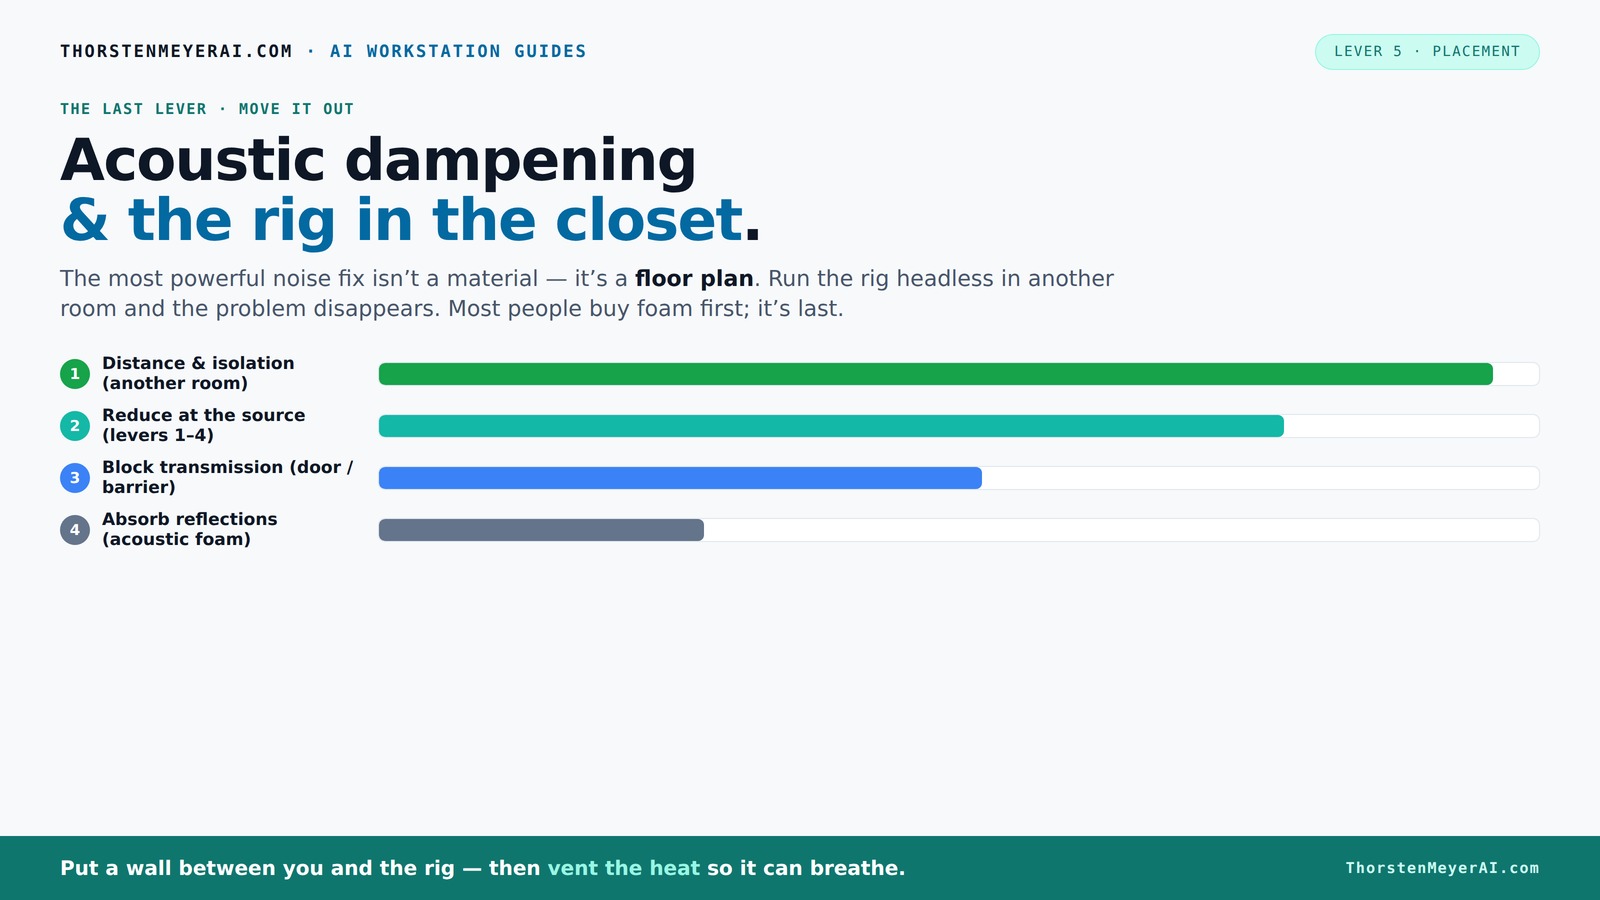
& the rig in the closet.
The most powerful noise fix isn’t a material — it’s a floor plan. A rig you can’t hear because it’s in another room beats any amount of foam. Tap the approaches in Part 1 to see what actually works.
(another room)
(levers 1–4)
(door / barrier)
(acoustic foam)
Contain the noise, not the heat
Key Takeaways
- Prioritize placement of panels at reflection points over covering every wall.
- Use bass traps in corners to control low-frequency muddiness in small spaces.
- Sealing gaps around doors and vents is crucial for reducing noise leaks.
- Moving your rig into a different room or using smart placement can eliminate most noise without treatment.
- Proper ventilation is essential when placing a rig in a closet or enclosed space to prevent overheating.
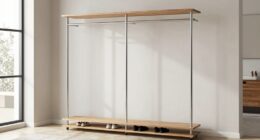
soundproofing acoustic panels for closet
As an affiliate, we earn on qualifying purchases.
As an affiliate, we earn on qualifying purchases.
What Acoustic Dampening Really Means — And What It Doesn’t
Acoustic dampening is about reducing echoes and harsh reflections, not silencing noise like a soundproof room. Think of it as turning a muddy pond into a still lake — less splash, clearer reflection. Foam panels and diffusers absorb or scatter sound waves, making recordings crisper and less echoey. But they won't stop your neighbor’s lawnmower or the street noise.
For example, if your recording space sounds like shouting inside a tin can, adding foam will soften it but won’t block the outside noise from seeping in. That’s where soundproofing — sealing gaps, using barriers — comes into play. So, dampening improves what you hear inside, while soundproofing blocks what comes from outside.
Understanding this distinction is crucial because it influences your approach and budget. Relying solely on foam might give you a less echoey room but won't eliminate external distractions. Conversely, investing in soundproofing can be costly and complex, but necessary if outside noise is a major issue. Knowing what each technique accomplishes helps you prioritize your efforts and avoid frustration from expecting one to do the other's job.
portable vocal booth for small spaces
As an affiliate, we earn on qualifying purchases.
As an affiliate, we earn on qualifying purchases.
Soundproofing vs. Acoustic Treatment — Why They’re Not the Same
| Goal | What It Does |
|---|---|
| Soundproofing | Blocks external noise from entering or leaving a space by creating barriers that prevent sound waves from passing through walls, doors, and windows. Think of heavy, sealed walls, multiple layers of drywall, or door gaskets designed to absorb or reflect sound energy, effectively isolating your space from outside noise sources. |
| Acoustic treatment | Improves the internal sound quality by reducing echoes, flutter, and harsh reflections within the room. It involves installing foam panels, diffusers, and bass traps that absorb or scatter sound waves, making recordings clearer and more natural. Unlike soundproofing, it doesn’t prevent sound from entering or leaving but enhances how the room sounds internally. |
In a small closet, understanding this difference guides your investment. If outside noise constantly intrudes, focus on soundproofing elements like sealing gaps or adding mass to walls. If your main issue is echo or room tone, acoustic treatment is more appropriate. Often, combining both yields the best results, but each has specific tradeoffs: soundproofing can be expensive and complex, while treatment is generally more affordable but less effective at blocking external noise.
For instance, sealing the door with weatherstripping might reduce noise leaks, but foam panels won’t prevent a loud street from seeping in. Conversely, adding mass with drywall and insulation can help block outside noise but may be overkill if echo and reflections are your primary concern. Recognizing these nuances helps allocate your resources wisely and set realistic expectations.
soundproof door seals for recording rooms
As an affiliate, we earn on qualifying purchases.
As an affiliate, we earn on qualifying purchases.
Understanding Reflection Points and Their Impact
One of the most effective strategies in acoustic treatment is targeting the reflection points where sound waves bounce directly into your microphone or listening position. These points are critical because reflections at these spots create echo and muddiness, especially in small spaces like closets.
Identifying these reflection points involves a simple technique called the mirror trick: sit at your mic or monitor, and have a friend move a mirror along the wall. When you see the speaker or mic reflected in the mirror, that’s where you should place your acoustic panels. By treating these key spots, you significantly reduce harsh echoes and improve clarity.
Why does this matter? Because placing panels randomly across your walls is less effective and more costly. Targeted placement ensures you get the most benefit for your investment, making your space sound much more professional without extensive modifications. This approach also helps you understand the room’s unique acoustic behavior, allowing you to tailor your treatment plan effectively.
acoustic treatment foam panels
As an affiliate, we earn on qualifying purchases.
As an affiliate, we earn on qualifying purchases.
The Role of Bass Traps and Low-Frequency Management
While treating mid and high-frequency reflections is straightforward, managing low-frequency muddiness requires special attention. Bass frequencies tend to accumulate in corners and can cause a boomy, undefined sound that muddles recordings.
Bass traps are specialized panels designed to absorb these low frequencies, and placing them in the corners—where bass naturally accumulates—is essential. In small closets, adding bass traps in the upper corners or behind your listening spot helps tame this muddiness, resulting in a clearer, more balanced sound.
However, bass traps often come with tradeoffs: they can be bulky, expensive, and require careful placement. Over-treating low frequencies without addressing mid and high reflections can lead to an unbalanced sound. Understanding the room’s acoustic profile—using measurement tools if necessary—helps you decide where to install traps and how much treatment is enough.
Frequently Asked Questions
Do I need soundproofing or just acoustic treatment?
If you want to block outside noise from entering or leaving your space, soundproofing is necessary. For improving how your room sounds — reducing echo and harshness — acoustic treatment is enough. Most home setups benefit from a mix, but for a closet, focus primarily on treatment unless noise leakage is a big issue.Where should I place acoustic panels in a closet or small booth?
Start by identifying reflection points using the mirror trick: sit at your mic or monitorur mic or listening spot, move a mirror along the wall, and mark where you see the speakers or mic reflected. Place panels at those spots, especially on side walls, the ceiling, and behind the mic, to cut down harsh echoes.Should I treat the corners first or the walls?
Treat the reflection points on the walls first to control echoes. Corners are mainly for bass traps to tame low frequencies. If your recordings sound boomy or muddy, add bass traps in the upper corners after addressing the surface reflections. This approach ensures you handle both mid/high frequency reflections and low-end muddiness effectively, understanding that each addresses different acoustic issues with specific tradeoffs in cost and complexity.Will foam panels stop outside noise?
No, foam panels absorb sound reflections inside the room but do not block outside noise from entering. To reduce external noise, you need sealing gaps and adding barriers like a door seal or a solid wall. Recognizing this prevents wasted effort on ineffective treatments and helps you plan for more comprehensive solutions if needed.How can I make a closet work for vocals on a budget?
Start with thick moving blankets or rugs hung over the door and on walls. Seal gaps with weatherstripping. Use a close-miking technique with a dynamic mic to reduce room sound. These simple steps drastically improve recording quality without spending much. Understanding the tradeoffs, like potential for a slightly boxy sound, helps you optimize your setup within budget constraints.Conclusion
In a small space like a closet, the real magic lies in where and how you treat reflections, not just filling the room with foam. Moving your rig to a different room or using smart placement can cut noise dramatically — often more than any passive dampening. Think of your closet as a blank canvas: with the right tweaks, it can become an effective, budget-friendly vocal booth or workspace.
Remember, the key isn’t total silence, but controlling what’s inside your space. Focus on reflection points, sealing gaps, and managing low frequencies. Your perfect, quiet recording corner is just a few smart moves away.